
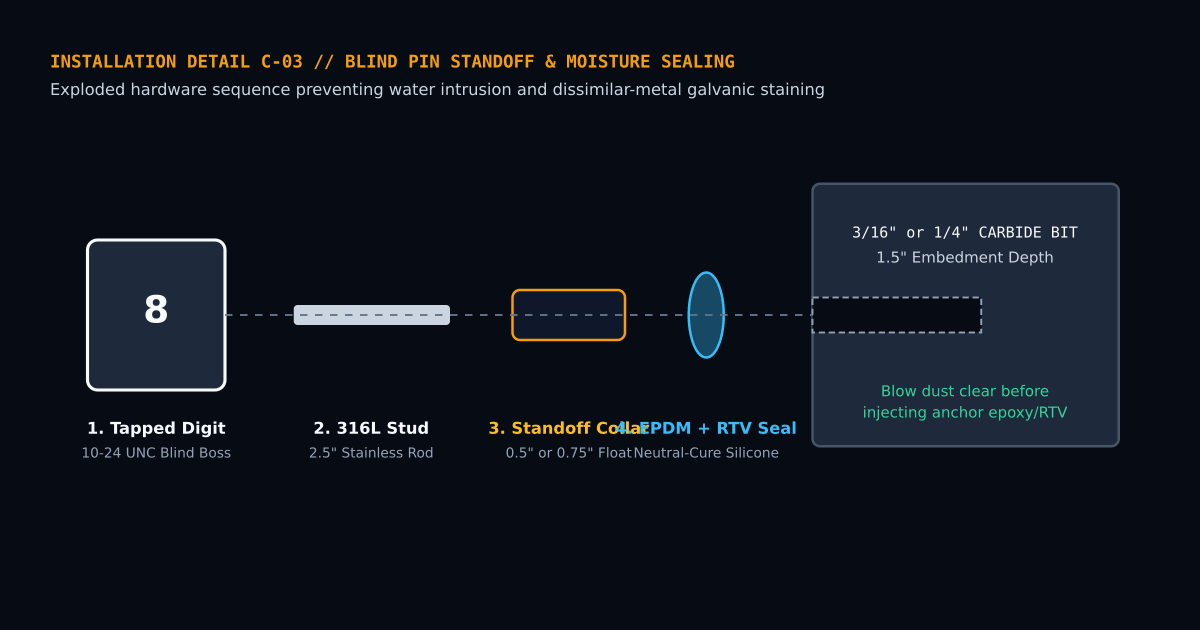
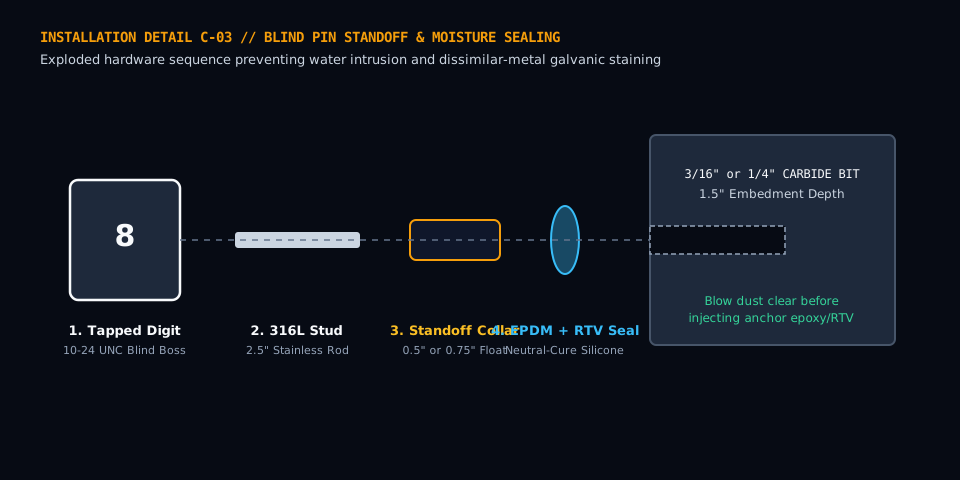
Floating pin-mount house numbers deliver crisp architectural depth—casting daytime drop shadows across smooth stucco and concealing every fastener behind the numeral face. Yet poor drilling technique can spall kiln-fired brick faces, tear synthetic EIFS foam coats, wick rainwater behind building paper, or streak white walls with rusty galvanic runoff. Following substrate-specific bit selection and neutral-cure weatherproofing keeps standoff hardware rock-solid for decades.
Brick vs. Mortar Joints: Where Should You Drill?
Homeowners installing floating numbers on clay brick piers face an immediate choice: drill directly into the brick face or aim for the mortar joints? With a full-size paper drilling template where two or three threaded studs sit fixed distances apart on the back of each digit, you rarely get every hole to land inside a 3/8-inch mortar bed. Here is how exterior sign installers handle brick:
- Solid Cored Clay Brick: Modern kiln-fired brick handles
3/16-inchor1/4-inchcarbide masonry holes cleanly provided you turn OFF aggressive rotary-hammer percussion for the first 1/4 inch so the glaze face does not blow out or spall. Start in rotary-only mode with a sharp multi-grind carbide bit (such as Bosch Hex-9 Multi-Construction), then engage light hammer action once past the surface skin, staying at least1 inchaway from vertical brick edges. - Historic Soft Lime Brick: On pre-1940 soft brick where vibration cracks aged units, mount your floating digits onto a solid architectural aluminum or slate backer plate first, then anchor the backer plate strictly into the sacrificial mortar joints using two or four stainless masonry anchors—allowing future tuckpointing to restore the wall completely if the sign is ever moved.
Three-Coat Cement Stucco vs. Synthetic EIFS Foam Cladding
Not all stucco walls share the same structural anatomy. Knock gently on the wall with your knuckle before picking up a drill:
1. Traditional Hard-Coat Portland Cement Stucco (7/8-Inch over Wire Lath)
Hard-coat stucco sounds solid like concrete and consists of scratch, brown, and finish coats applied over galvanized wire lath and weather-resistive building paper (WRB). Use a 3/16-inch or 1/4-inch carbide masonry bit to penetrate the cement coat to a depth of 1.25 inches, stopping before you puncture deep into interior cavities unless routing a Class 2 LED wire. Blow all pulverized cement dust out of each hole with a rubber bulb blower, inject exterior-grade neutral-cure (oxime/alkoxy) 100% RTV silicone into the hole, press in the ribbed nylon friction sleeve, and add a second bead around the stud base so the weather barrier stays 100% sealed.
2. Synthetic EIFS (Exterior Insulation and Finish System)
If knocking produces a hollow, drum-like thud, the facade is likely a thin acrylic polymer lamina over expanded polystyrene (EPS) rigid foam insulation. Standard friction plugs spin uselessly inside soft foam. Instead, drill only a tight pilot through the outer fiberglass mesh coat, coat 3.5-inch extra-long stainless threaded rods in polyurethane construction adhesive plus neutral-cure silicone at the surface collar, or anchor into underlying OSB sheathing/studs using specialized EIFS spiral insulation anchors with EPDM compression washers.
Why Acid-Cure (Acetoxy) Silicone Ruins Masonry & Brass
Never use household bathroom caulk that smells like vinegar while curing. Acetoxy-cure silicone releases acetic acid, which etches alkaline Portland cement stucco (breaking the perimeter bond within one rainy season) and accelerates tarnish and verdigris pitting on C36000 architectural brass and copper alloys. Always verify the tube label specifies Neutral-Cure Architectural Grade Silicone.
Substrate Bit, Depth & Sealant Matrix
| Exterior Wall Substrate | Recommended Drill Bit | Pilot Diameter (for 10-24 Studs) | Target Hole Depth | Anchoring & Weather Seal Method |
|---|---|---|---|---|
| Kiln-Fired Brick / CMU | Multi-grind carbide masonry bit | 3/16 in (sleeve) or 5/32 in (epoxy) | 1.50 in (38 mm) | Flanged nylon masonry plug + neutral RTV or 2-part acrylate epoxy |
| Hard-Coat Cement Stucco | Carbide rotary bit (no heavy hammer) | 3/16 in (4.8 mm) | 1.25 - 1.50 in | Ribbed friction sleeve + generous neutral RTV silicone plug seal |
| Natural Granite / Ledger Stone | Diamond core / brazed grit bit (wet-cooled) | 1/4 in (6.4 mm) | 1.50 in (38 mm) | Non-staining stone-safe neutral silicone + stainless threaded stud |
| Cedar / Redwood / Wood Trim | Brad-point wood bit | 9/64 in or 5/32 in | 1.25 in (32 mm) | Press-fit into tight wood grain with exterior polyurethane adhesive |
| Fiber-Cement Lap Siding | Carbide-tipped masonry/tile bit | 3/16 in through board into sheathing | 1.50 in (38 mm) | EPDM neoprene standoff washer + neutral RTV seal against lap face |
Preventing Rust Streaks: 304 vs. 316L Stainless & Galvanic Isolation
Nothing ruins fresh white stucco faster than brown rust tear-stains weeping down from cheap zinc-plated mounting pins after six months of coastal fog. Even when the visible house number is solid cast aluminum or brass, budget manufacturers sometimes ship mild carbon-steel threaded studs in the hardware bag. Always test included mounting pins with a shop magnet or specify 316L molybdenum-bearing austenitic stainless steel studs—essential within five miles of saltwater coastlines or alongside de-icing road salt.
Finally, when mounting solid C36000 brass or bronze numbers onto aluminum flashings or galvanized lath, slip thin non-conductive nylon or EPDM washers onto the studs so rainwater cannot bridge dissimilar metals as an electrolyte.
Need Sizing Verification or a Custom Plaque Quote?
Test your address on our Live Day/Night Halo Simulator or email your facade photo and street setback to info@housesignage.com.